Everyone gets a WiFi
Building on my earlier blog post on setting up PCIe pass through with bhyve , I've found a little time to move things around in my test bed and try something stupid.
Bitcoin is certainly a terrible thing, but it has made some useful components super cheap (though they are getting rare again). One feature of bitcoin mining is that it is super low usage on the PCIe bus, you feed your GPU something to do, it does it, and if you find a result you send a couple of hundred bytes back. That leaves a lot of bandwidth left over.
Miners knew what to do with this took advantage of PCIe topology and added switches, expanders and risers to get as many GPUs per motherboard as they could.
We can apply their tools for other things like driver development.
The idea is this, get a bunch of devices onto a VM host through the use of cheap downstream PCIe switches, have the host ignore them and make them available to guests on the host.
This makes it possible to do a lot of concentrated testing. You can for example stick 4 different revisions of a card on host and simultaneously test them all on the latest current, or stick 3 versions of the same card on the bus and test them on CURRENT, STABLE and STABLE-1 at the same time to unsure there aren't regressions.
For porting you could run guests for FreeBSD, Linux and OpenBSD and compare functionality and commands to the card for debugging.
Proof of Concept
I had this idea early this year and managed to get a POC together in a short 12 months of forgetting about it and an afternoon of moving machines around in the attic.
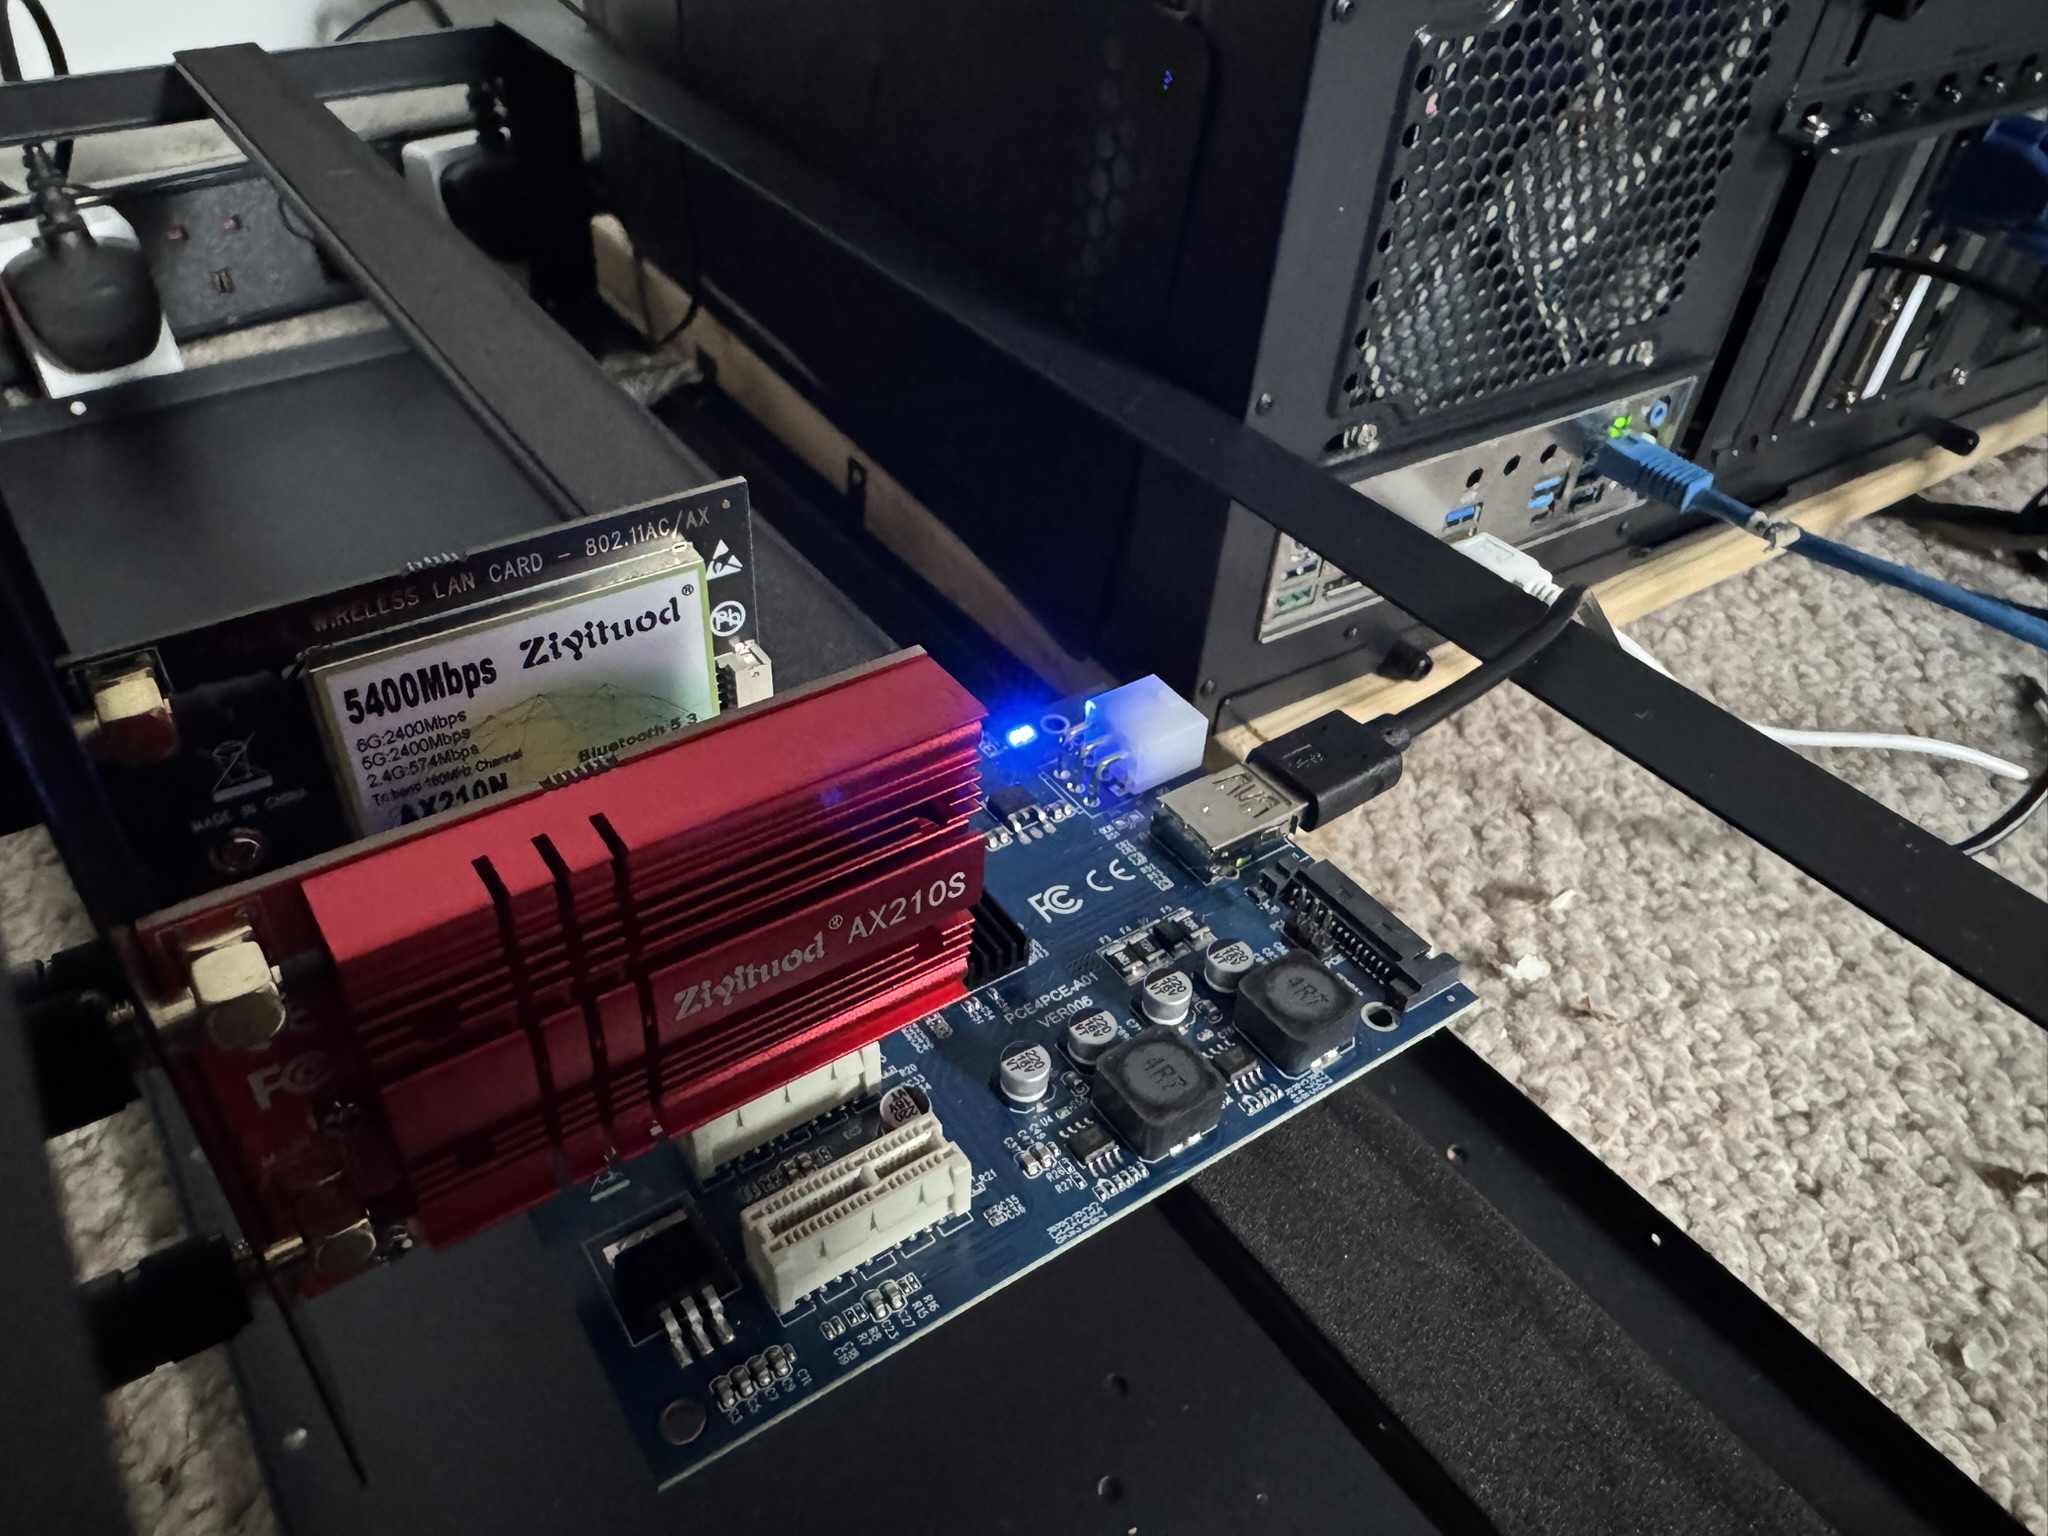
I picked up two types of PCIe expander, PCIe x1 -> x16 risers (which aren't used right now) and an ASMedia ASM1184e 4-Port PCIe x1 Gen2 Packet Switch'. Later I got a cheap 12 GPU frame, adding a final piece of structure needed to make the set up practical.
The PCIe expander uses a USB3-A cable to carry the PCIe bus out an adapter card connected to the motherboard out to the switch board. The switch board has 4 PCIe x1 slots for cards.
I mounted all this on the frame with 2 Intel AX210 WiFi cards for a POC.
Pulling the card to check functionality the switch appears in
pciconf -lf
like so:
pcib6@pci0:5:0:0:       class=0x060400 rev=0x00 hdr=0x01 vendor=0x1b21 device=0x1184 subvendor=0x1b21 subdevice=0x118f
    vendor     = 'ASMedia Technology Inc.'
    device     = 'ASM1184e 4-Port PCIe x1 Gen2 Packet Switch'
    class      = bridge
    subclass   = PCI-PCI
pcib7@pci0:6:1:0:       class=0x060400 rev=0x00 hdr=0x01 vendor=0x1b21 device=0x1184 subvendor=0x1b21 subdevice=0x118f
    vendor     = 'ASMedia Technology Inc.'
    device     = 'ASM1184e 4-Port PCIe x1 Gen2 Packet Switch'
    class      = bridge
    subclass   = PCI-PCI
pcib8@pci0:6:3:0:       class=0x060400 rev=0x00 hdr=0x01 vendor=0x1b21 device=0x1184 subvendor=0x1b21 subdevice=0x118f
    vendor     = 'ASMedia Technology Inc.'
    device     = 'ASM1184e 4-Port PCIe x1 Gen2 Packet Switch'
    class      = bridge
    subclass   = PCI-PCI
pcib9@pci0:6:5:0:       class=0x060400 rev=0x00 hdr=0x01 vendor=0x1b21 device=0x1184 subvendor=0x1b21 subdevice=0x118f
    vendor     = 'ASMedia Technology Inc.'
    device     = 'ASM1184e 4-Port PCIe x1 Gen2 Packet Switch'
    class      = bridge
    subclass   = PCI-PCI
pcib10@pci0:6:7:0:      class=0x060400 rev=0x00 hdr=0x01 vendor=0x1b21 device=0x1184 subvendor=0x1b21 subdevice=0x118f
    vendor     = 'ASMedia Technology Inc.'
    device     = 'ASM1184e 4-Port PCIe x1 Gen2 Packet Switch'
    class      = bridge
    subclass   = PCI-PCI
With the switch there I added the two PCIe WiFi cards and rebooted:
pcib6@pci0:5:0:0:       class=0x060400 rev=0x00 hdr=0x01 vendor=0x1b21 device=0x1184 subvendor=0x1b21 subdevice=0x118f
    vendor     = 'ASMedia Technology Inc.'
    device     = 'ASM1184e 4-Port PCIe x1 Gen2 Packet Switch'
    class      = bridge
    subclass   = PCI-PCI
pcib7@pci0:6:1:0:       class=0x060400 rev=0x00 hdr=0x01 vendor=0x1b21 device=0x1184 subvendor=0x1b21 subdevice=0x118f
    vendor     = 'ASMedia Technology Inc.'
    device     = 'ASM1184e 4-Port PCIe x1 Gen2 Packet Switch'
    class      = bridge
    subclass   = PCI-PCI
pcib8@pci0:6:3:0:       class=0x060400 rev=0x00 hdr=0x01 vendor=0x1b21 device=0x1184 subvendor=0x1b21 subdevice=0x118f
    vendor     = 'ASMedia Technology Inc.'
    device     = 'ASM1184e 4-Port PCIe x1 Gen2 Packet Switch'
    class      = bridge
    subclass   = PCI-PCI
pcib9@pci0:6:5:0:       class=0x060400 rev=0x00 hdr=0x01 vendor=0x1b21 device=0x1184 subvendor=0x1b21 subdevice=0x118f
    vendor     = 'ASMedia Technology Inc.'
    device     = 'ASM1184e 4-Port PCIe x1 Gen2 Packet Switch'
    class      = bridge
    subclass   = PCI-PCI
pcib10@pci0:6:7:0:      class=0x060400 rev=0x00 hdr=0x01 vendor=0x1b21 device=0x1184 subvendor=0x1b21 subdevice=0x118f
    vendor     = 'ASMedia Technology Inc.'
    device     = 'ASM1184e 4-Port PCIe x1 Gen2 Packet Switch'
    class      = bridge
    subclass   = PCI-PCI
iwlwifi0@pci0:7:0:0:    class=0x028000 rev=0x1a hdr=0x00 vendor=0x8086 device=0x2725 subvendor=0x8086 subdevice=0x0024
    vendor     = 'Intel Corporation'
    device     = 'Wi-Fi 6E(802.11ax) AX210/AX1675* 2x2 [Typhoon Peak]'
    class      = network
iwlwifi1@pci0:10:0:0:   class=0x028000 rev=0x1a hdr=0x00 vendor=0x8086 device=0x2725 subvendor=0x8086 subdevice=0x0024
    vendor     = 'Intel Corporation'
    device     = 'Wi-Fi 6E(802.11ax) AX210/AX1675* 2x2 [Typhoon Peak]'
    class      = network
Each card can be used on the host simultaneously. I took the cards from the
host and enabled PCIe pass through for AMD in
/boot/loader.conf
:
pptdevs="7/0/0 10/0/0"          # intel ax210 wifi
hw.vmm.amdvi.enable=1
Finally I used the script from the previous post to run two FreeBSD CURRENT VMs, giving each one of the cards and the successfully came up and could do the wireless.
The cards can scan from here, harder workloads are a future problem. I want to install 2 more expanders on this machine and more cards to see how things work when heavily loaded. This 12 GPU bracket has 35 holes so I could add a lot of stuff.
There are PCIe bus overheads here, I'm reducing down a PCIe4 bus to PCIe2 for the Wifi cards, but they aren't exactly high performance devices in PCIe terms. I might also hit power limits, I didn't really want to ask about doing this POC, I figured I wouldn't get good answers based on similar questions on the FreeBSD mailing lists in the last year.
This seems to work, scaling is to be seen.
My work on FreeBSD is supported by the FreeBSD Foundation , you can contribute to improving FreeBSD with code, documentation or financially by donating to the FreeBSD Foundation .