I’m not great about backups, I’m probably very good at backups compared to
most, but not compared to the zfs experts I know. They are an outlier and
shouldn't have been counted.
I am confused at why so few machines offer dual NVMe, I guess I understand
laptops, but everything has space and power. If one is none then everyone
should want their base storage to be a mirror.
Ideally there would be something with the power performance profile of the Mac
mini, but with the ability to run the software I want without jumping through
infinite hoops. Alas no, I’m stuck with the choice between poorly supported
slow SBCs or expensive Intel boxes.
One day early in 2024 while searching Ali express for “dual nvme computer” as
you do I found the Morefine M6.
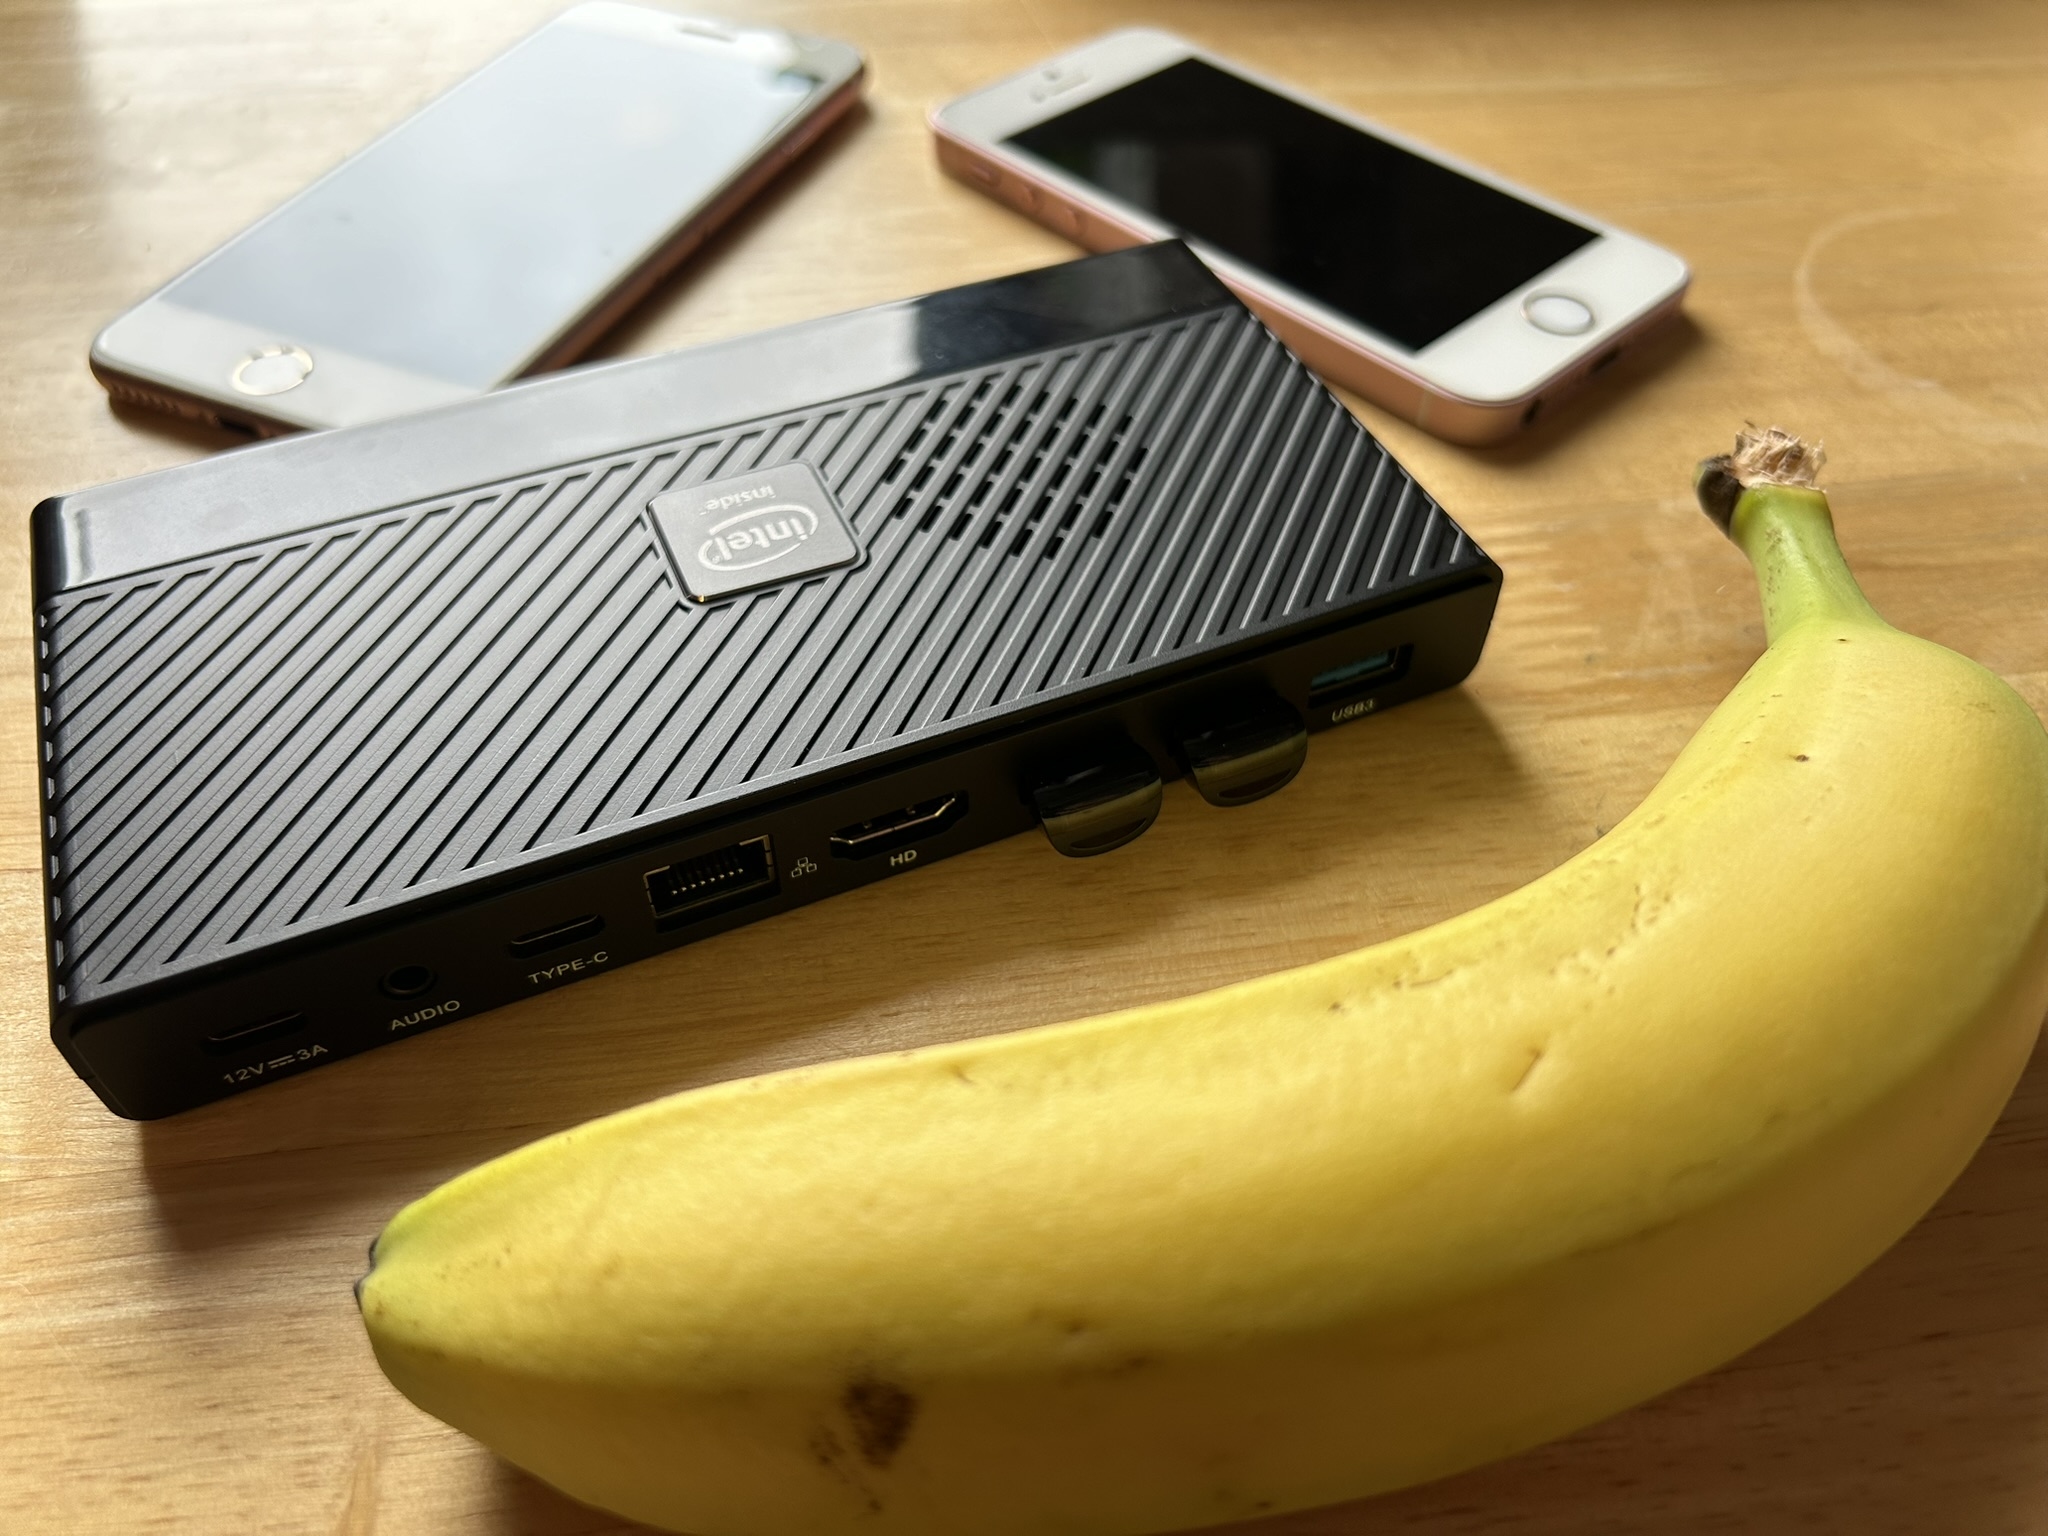
This is a phone sized Intel N200 based SBC, it sports dual NVMe slots, 2.5G
wired network, high speed wireless, usb-c for power, usb-c for data and three
USB3 ports. This thing is a dream, a tiny machine with mirrorable storage that
will run off nothing.
I had an idea for the M6 immediately, it can live on my desktop as a first hop
backup target for my laptop. Mirror to the M6 at 2.5Gbit/s and it can then
gradually upload to the cloud over the terrible VDSL (we since moved and have
symmetric gigabit fiber, greatly reducing upload times, but the idea was still
compelling).
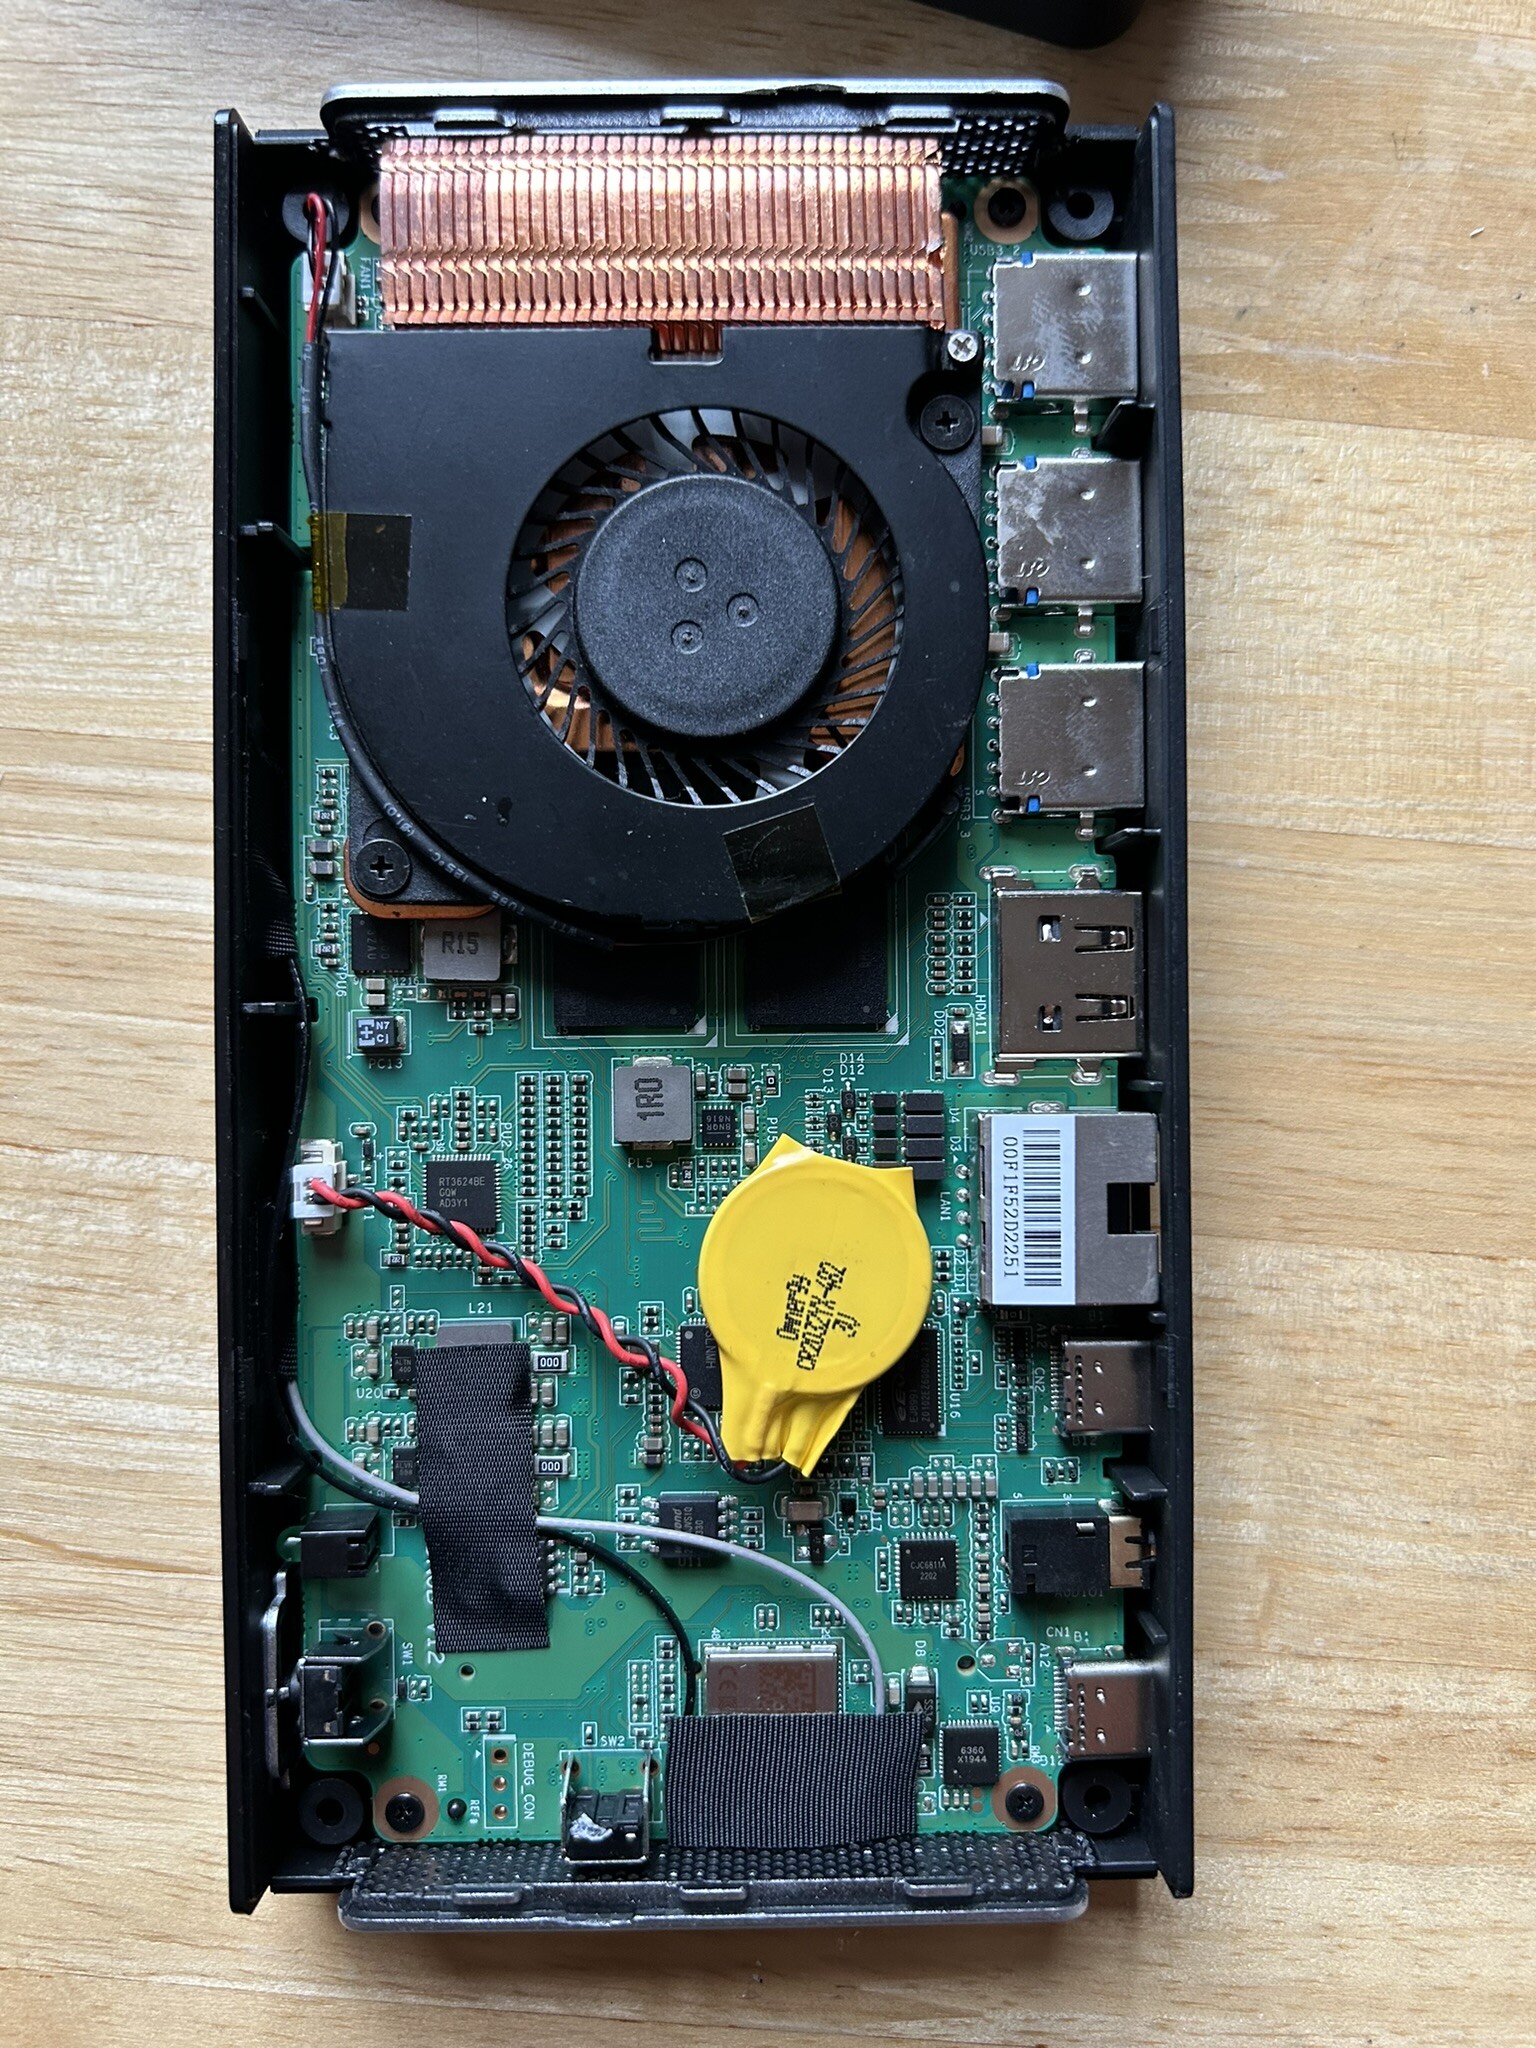
The M6 came and I was immediately surprised at the weight of the device. I had
thought from the pictures that it was an aluminium body, a metal that would act
as a heat sink. Instead the entire case is plastic and there is a tiny fan and
heat pipe arrangement to move heat away.
The second impression was the fan noise. This think is incredibly loud, the two
pin fan has no way to control speed so it is always going.
The third thing was performance. The M6 arrived just as we closed on our house
so I could only do a minimum of testing. I installed FreeBSD to a pair of
mirrored usb sticks and started to do performance measurements of the CPU and
network and the M6 continually locked up or reset. I never caught what happen,
it was just dead.
Rather than debug this I bought and moved into a house a prepared for a child
to arrive. Disappointed I couldn't resolve back ups before life got too hectic.
Return to the M6
Some time passes and I return to work after some wonderful parental leave.
I started porting OpenBSD's iwx WiFi driver (via haiku for complete weirdness)
to FreeBSD. iwx supports Intel PCIe ax200, ax201, ax210 and ax211 chipsets,
this is currently supported by the Linux compat iwlwifi driver on FreeBSD.
OpenBSD decided rather than bloating iwm, to add a new driver supporting later
chipsets.
I always planned to use PCIe pass through and bhyve for development if it could
be possible. When I had a stub driver building I set up an OpenBSD test VM on
one of my testbed machines and discovered to much surprise that the PCIe test
card I had wasn't supported. I tried in iwlwifi and it also wasn't supported.
I ordered another card, but things seem to come the next day only when they
aren't needed and take weeks otherwise.
While waiting I tried the M6 and low and behold I was able to use iwx on
OpenBSD in a VM with PCIe pass through without any issue.
The M6 has been my main development target for the iwx port so far with FreeBSD
as a hyper visor and FreeBSD as a guest (and sometimes OpenBSD when I need to
compare command traces).
The M6 still locks up sometimes, but this has tampered off. I transfer kernels
to the guest over Ethernet and saturate the 2.5 Gbit link between my framework
laptop and the VM machine for these tiny transfers.
The M6 is limited to 6 cores, but the most strenuous thing it is doing is run
iperf. Mostly it sits there sipping power ready for work (and blasting that
stupid fan).
Improvements
Via Reddit I've almost found two things which offer improvements. The one I
have found is 3D models to replace the back of the case where the NVMe mounts
with a 3D printed metal plate to use as a heat sink.
The one I almost have is a model to completely replace the fan side with a heat
sink. If the M6 hadn't become so key I wouldn't consider these, but it is also
too important now to mess with a lot.
I’m on the road and it is wonderful to be able to take a tiny usb-c powered vm
host with me and get useful work done. I can’t wait for more computers in
stupid form factors like this.
Oh and the shenanigans I have planned for it when it is no longer my primary
development target.
Pictures
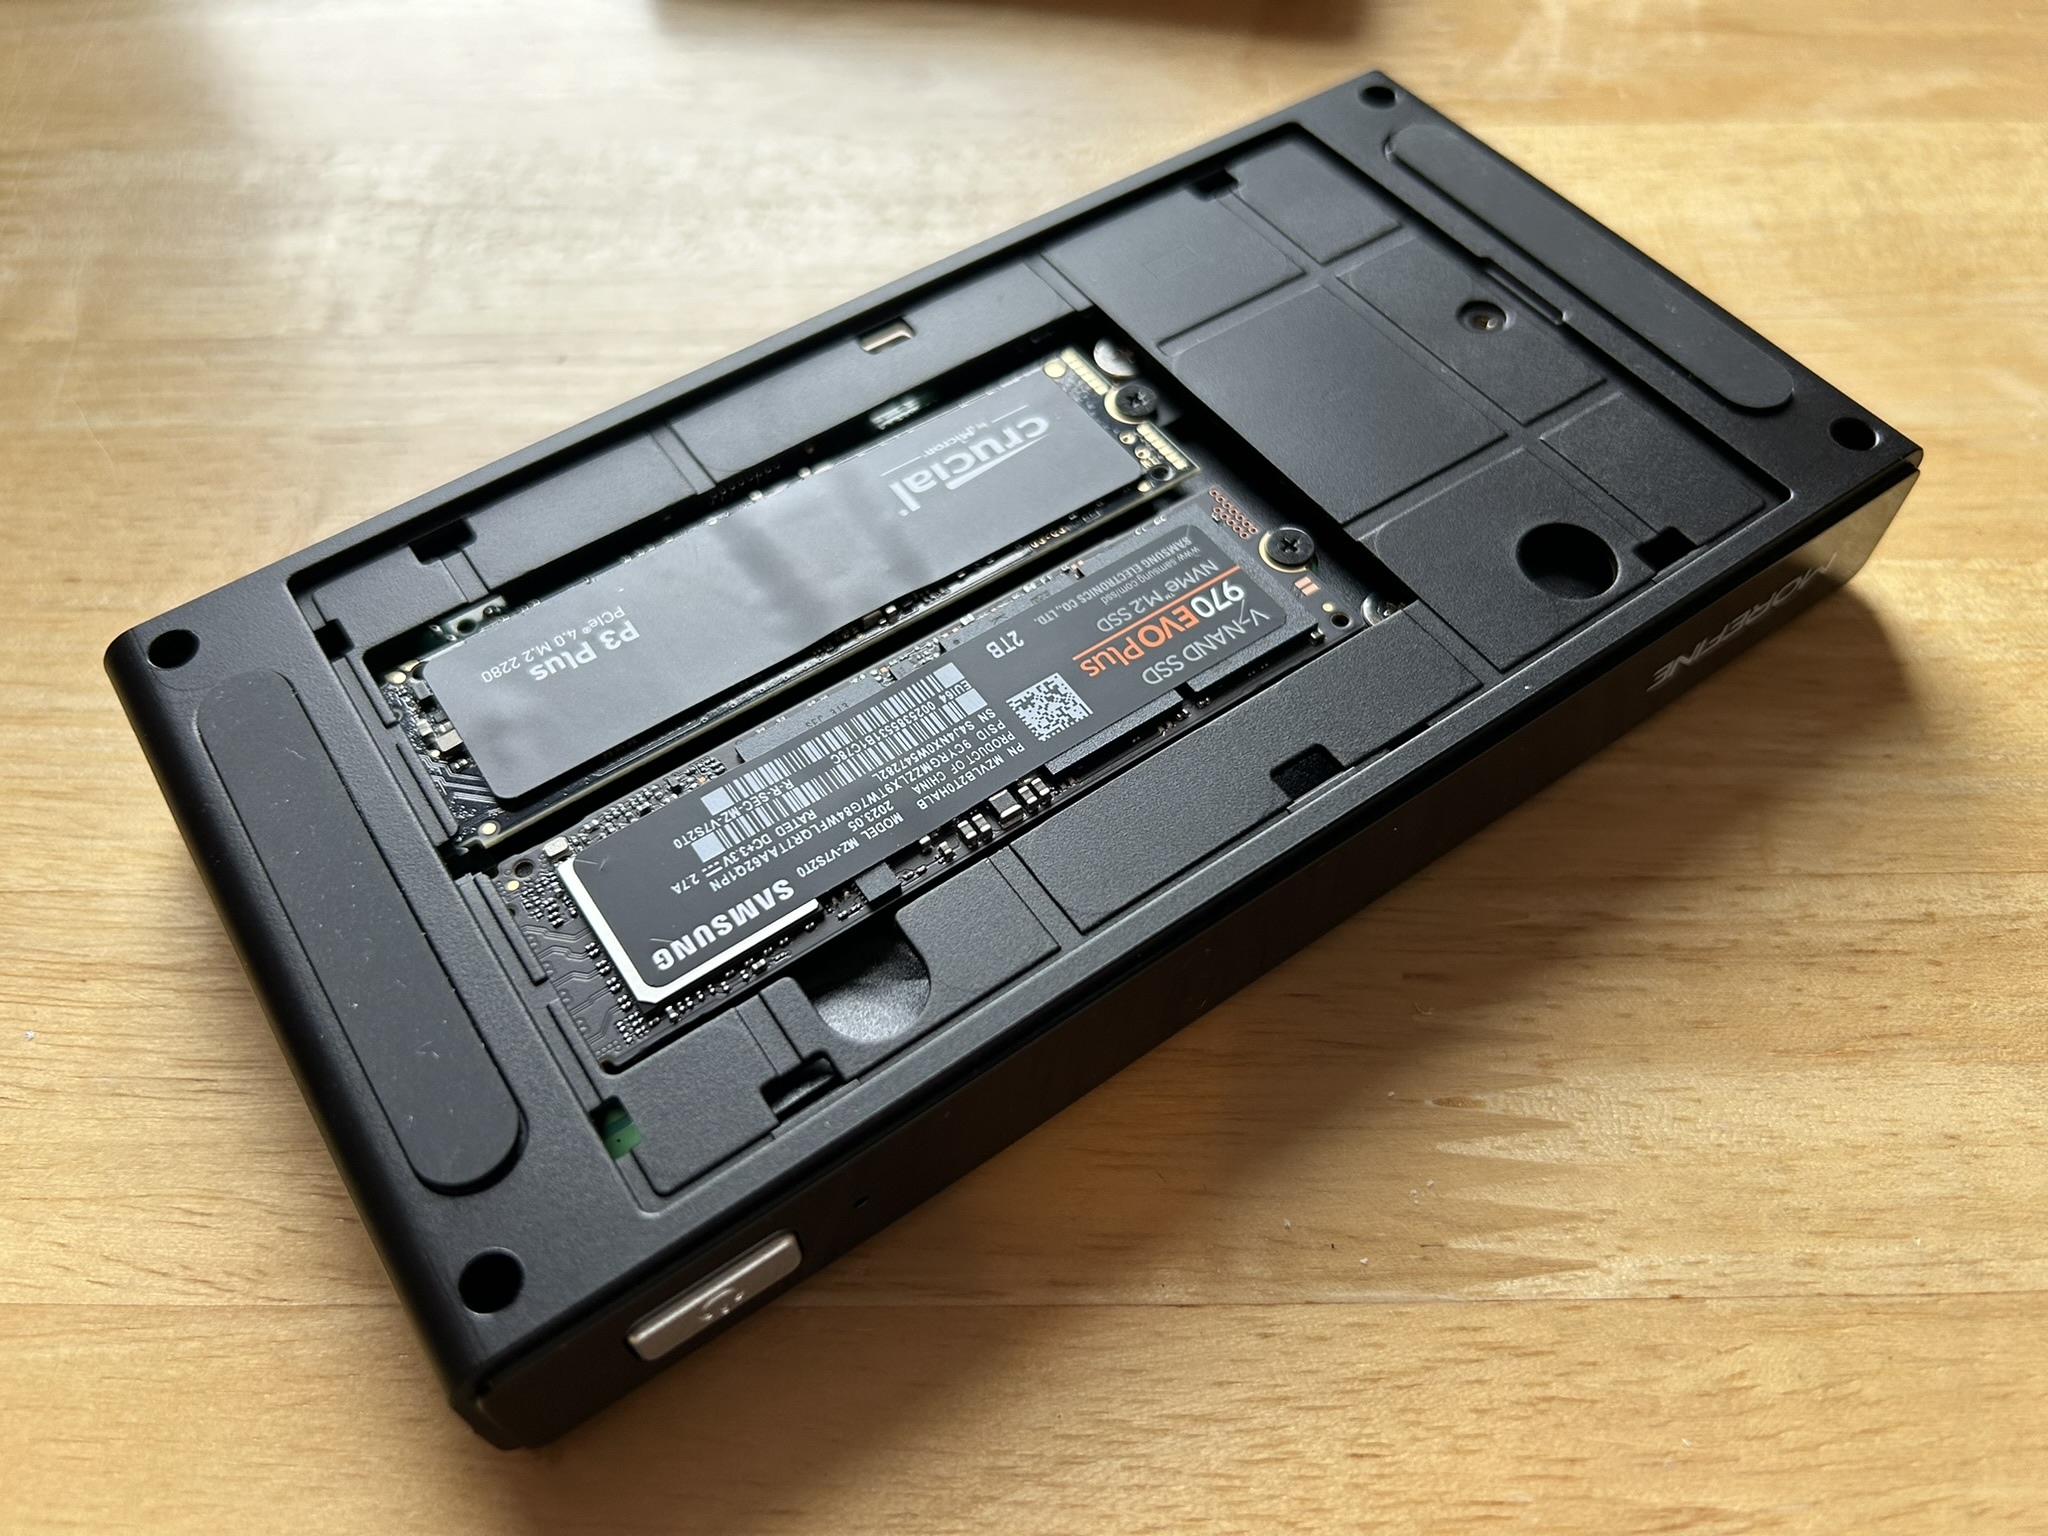
As a treat and for hackers here are its insides, the NVMe side is just slots
for the NVMe.